Step-by-Step Guide: Setting Up Your Game Ready Ice Machine
Getting the most out of your Game Ready ice machine starts with setting it up properly. If you just got a Game Ready device and are unsure how to use it, this article will walk you through step-by-step. Setting up your Game Ready is pretty straightforward once you know what to do. We’ll cover everything from filling the ice reservoir to programming the settings to start therapy. With a few key steps, you’ll have your Game Ready running smoothly to help treat injuries. This guide will ensure you get your unit ready to provide cold compression treatments safely and effectively. Read on to learn how to assemble your Game Ready, prep it for use, and use the controls to customize your therapy sessions. We’ll also provide some handy troubleshooting tips.
Prep the Area
Find a stable, flat surface like a table or counter top to place the Game Ready ice machine unit. Make sure the area is clean and dry. Have a power outlet nearby to plug in the device. Clear a space in your freezer or prepare a separate ice reservoir that will hold ice and water.
Fill the Ice Reservoir
The ice reservoir holds the ice water that circulates through the Game Ready wraps. It can hold up to 10 pounds of ice. Fill the reservoir 3⁄4 full with ice cubes or crushed ice. Then add cool water until the tank is full. The ideal water temperature is between 35-45°F. Avoid using warm tap water as this will reduce cooling efficiency.
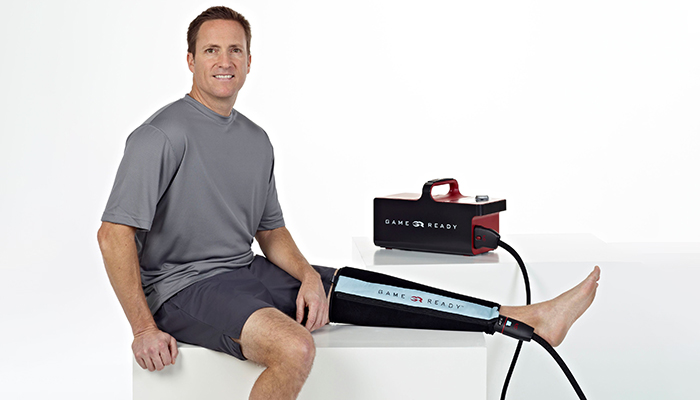
Connect the Wraps
Select the body wrap for the area you want to treat. Align the connector hose fittings and push together until they click into place securely. Make sure the wraps are completely deflated with no air inside before connecting them.
Attach the Reservoir
Lift up the handle on the unit and slide the ice reservoir into place. The reservoir should fit snugly onto the Game Ready device. Replace the handle to lock the reservoir in place.
Power Up
Plug the power cord into the Game Ready unit, then plug into an outlet. Flip the power switch to the ON position on the back of the device. The digital control screen will illuminate, indicating the unit is ready for operation.
Program the Settings
Use the control panel to input your desired treatment settings. You can adjust:
- Time – Set the length of the treatment session
- Pressure – Choose low, medium or high compression
- Temperature – Select the cold temperature from 35-50°F
The Game Ready has pre-set cycles that automatically alternate compression and cooling.
Start the Treatment
Once your settings are programmed, hit the start button to activate the cold and compression therapy. Make sure the connected wraps inflate, and the unit is circulating ice water properly.
Adjust and Monitor
Check the feel of the compression and cold temperature as you start the session. Make adjustments on the control panel as needed. The pump will run cycles of inflation and deflation based on your pressure setting. Monitor the ice reservoir and add more ice as it melts.
End the Session
When the treatment time is complete, the Game Ready unit will shut off automatically. Unplug the wraps and drain any remaining water from the reservoir. Be sure to fully deflate the wraps and disconnect them from the tubing after use.
Clean Up
It’s important to fully dry the wraps after use to prevent mold buildup. Wipe down the Game Ready device to keep the unit clean. Store wraps flat and do not fold over connector hose. Empty and clean out the ice reservoir after each use.
Conclusion
Following this setup guide will ensure you use your Game Ready device safely and effectively. Let the cold compression therapy accelerate your injury recovery. Contact the manufacturer with any product questions or issues.